
This sensory bin is perfect for dinosaur lovers! Your toddler or preschooler will love digging and exploring this dinosaur sensory bin. It’s an entertaining indoor learning activity for rainy or snowy days!
My kids go crazy for sensory bins! Sensory play is a crucial part of child development, and I find that sensory bins are one of our most engaging activities.
Now that the weather is getting colder (and I’m getting more and more pregnant), we are constantly looking for activities to do indoors. I’m frequently referencing this list of indoor activities, and sensory bins are one of the things that we gravitate towards the most.
This sensory bin was a popular one in our house. I actually introduced it a few months ago, but have been a little lazy on getting it published.
I featured it on my Instagram story awhile back. Many of my Instagram followers messaged me to tell me that their kids loved it, too!
If you’re a regular follower of this blog, you’ll know that we usually do our sensory bins with dry oatmeal. It’s so easy to vacuum and I can walk away knowing that if they sneak a taste it won’t hurt them. Especially with my 19 month old…that kid puts everything in her mouth!
This post contains affiliate links. I place the links for your convenience, but I may earn a small commission from the seller if a purchase is made from the links on this page. This does not cost you any more money, but it does help keep this website up and running. Thank you for supporting this small business!
Dinosaur Sensory Bin Filler
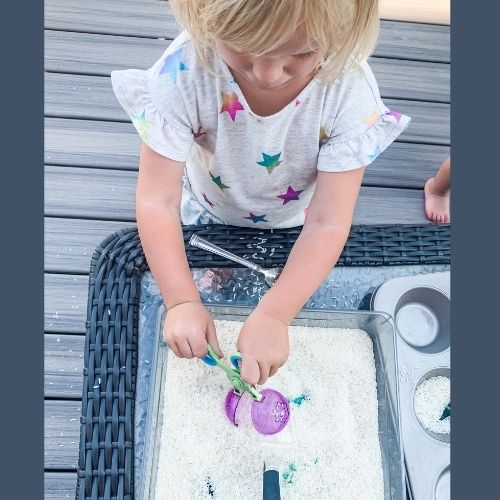
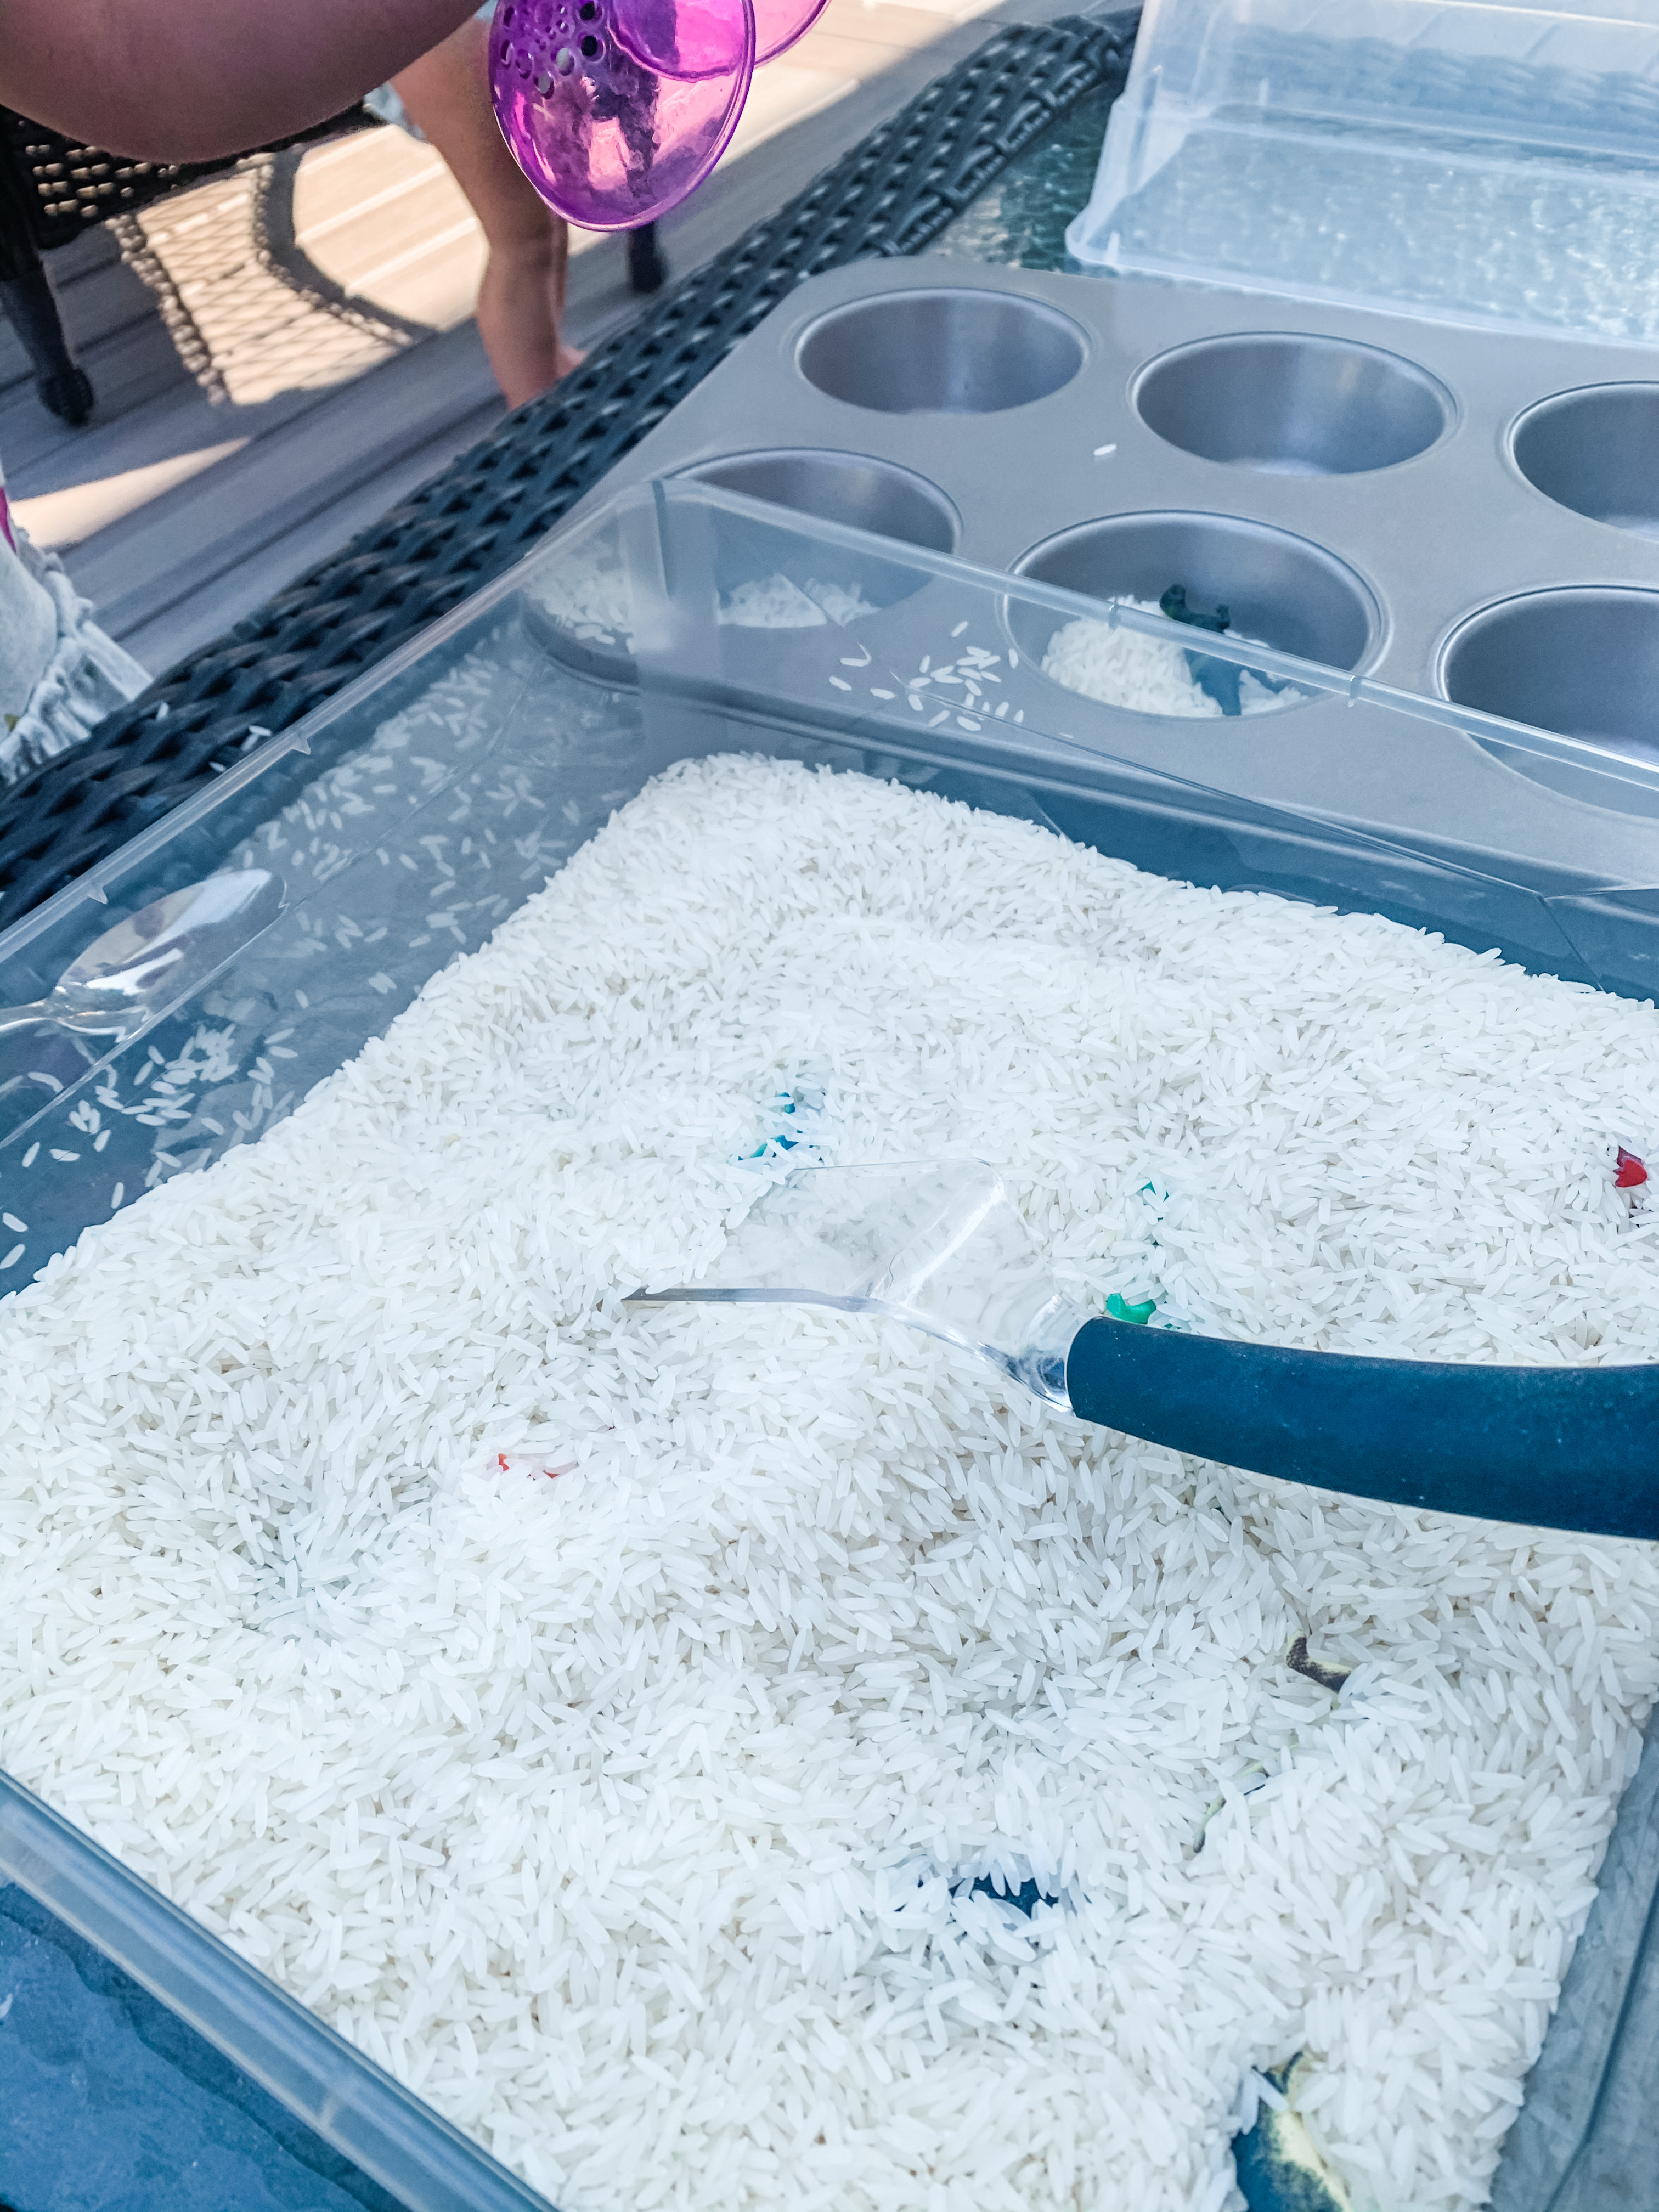
We used plain, uncooked rice for this sensory bin.
I usually use taste-safe sensory bin fillers, but uncooked rice is so much fun for my 3 year old. The texture is different from oatmeal, and it’s fun watching her dig and bury through the rice. I kept my 19 month old away from this bin, since raw rice is not good to eat.
I bought a huge bag of rice just for sensory play. If you’re a crafty mom, you can dye the rice to make it fun colors! Here’s a how-to on how to do that from another blogger. I’ll be straight with you – I don’t have the time or patience for that! Plain rice is just as much fun.
For a taste safe sensory bin filler, rice that is cooked and cooled would be a ton of fun. Instead of burying and digging out the dinosaurs, you could squish and mold the rice into mountains for the dinos to stand on, or mold the rice around the dinosaurs and pretend they are in eggs or fossilized.
Using crunched up cookies or cereal would be fun, too. Cereal that has been put into a blender makes a great sand, and chocolate cookies look like dirt. That could be a really fun taste-safe sensory bin filler!
Brown sugar is also a great filler for similar reasons. Like the cooked rice, it can be molded and holds shape really well. It also resembles sand, which can be fun, too! You could practice stamping and making dinosaur shapes in the sugar, too.
How to make the dinosaur sensory bin
What you need:
- Dinosaurs
- A container
- A filler (rice, brown sugar, ground oreos or cereal, etc.)
- Tools (such as scoops, brushes, tweezers, spoons, forks, shovels, etc.)
What the sensory bin teaches
- Object permanence
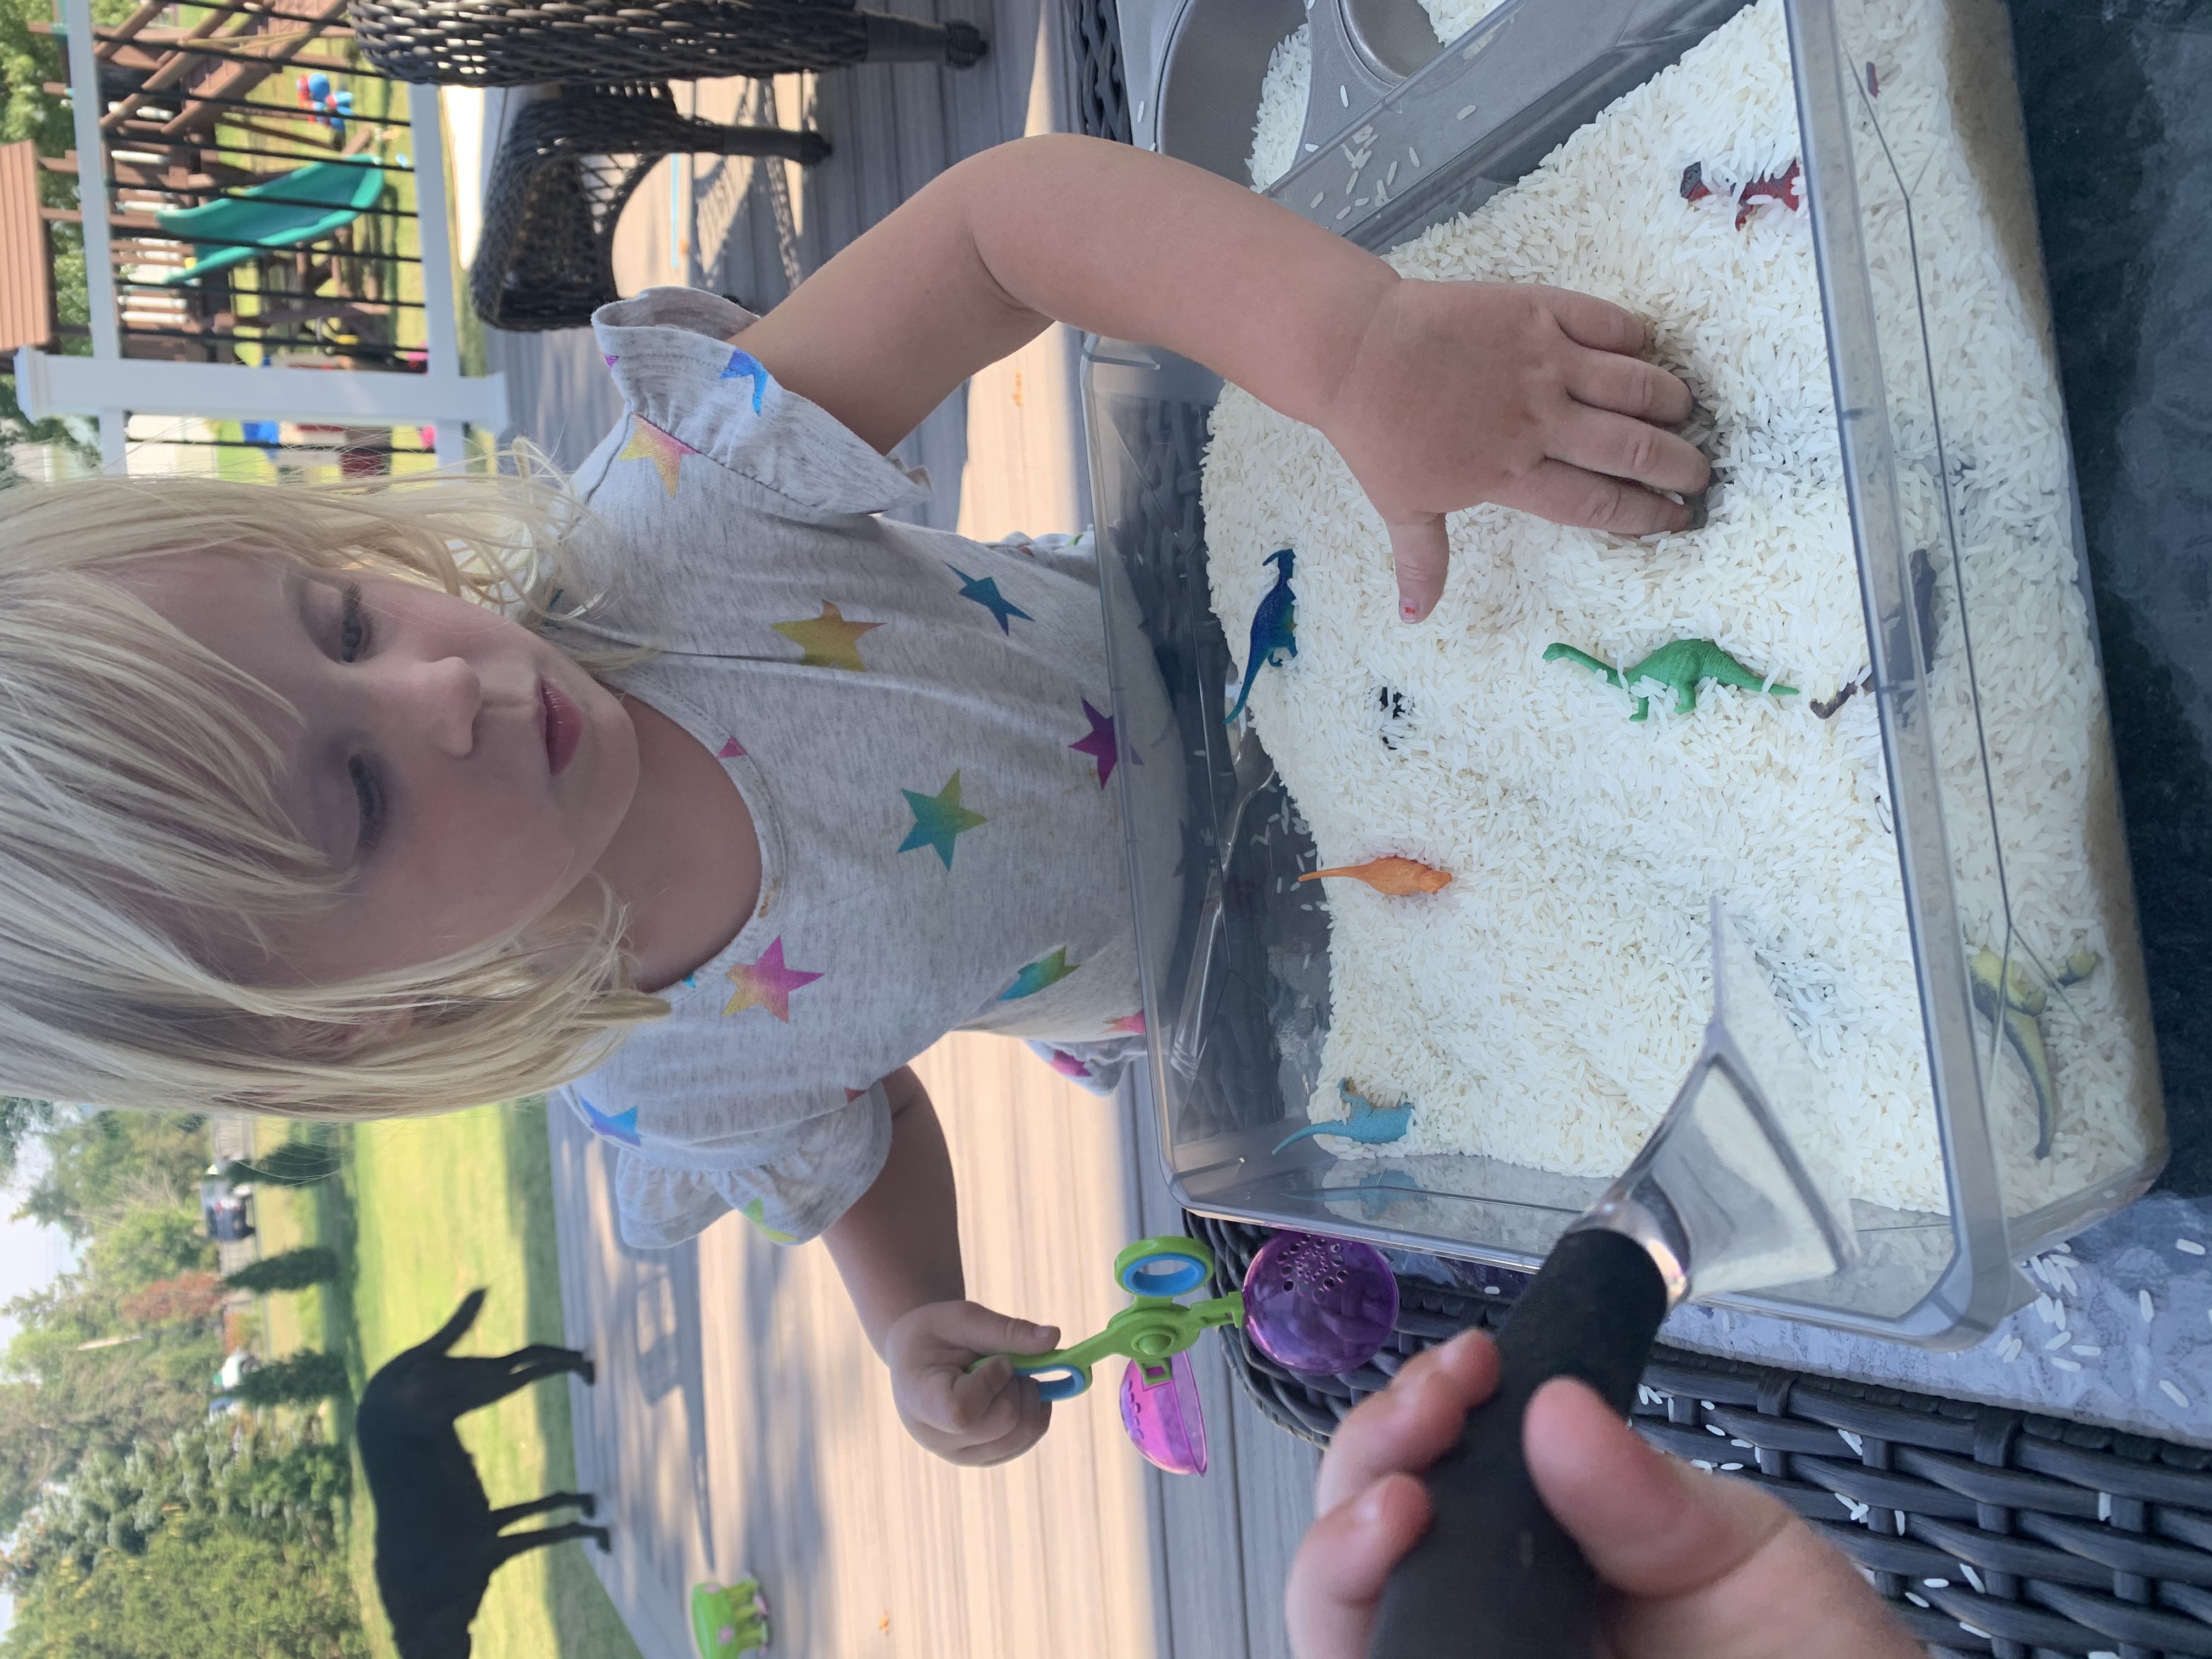
When you bury the dinosaur, it looks like it’s gone! But when you dig it back out, it’s in the same spot you left it. - Sorting
I gave my daughter a muffin tin to put the dinosaurs in once she dug them out. She sorted them by color, and then by size. I was amazed that she did this all unprompted, she created her own system for organizing the dinosaurs once they were “discovered.” - Fine motor skills
Using tools like tweezers and small scissor scoops helps develop fine motor skills. I bought this kit from Amazon a few months ago, and it’s been great for our sensory bins. - Colors and numbers
When my daughter was sorting the dinosaurs, I prompted her with a few questions about how and why she was sorting like she was. She explained about the colors and stripes on the dinosaurs and it was great reinforcement for learning her colors.
We also counted the dinosaurs. She struggles a little with numbers over 10, so this was a great way to practice since she was engaged and listening. - Meets sensory/texture needs
I think you’ll find that sensory bins are extremely captivating for young children. If you allow them to explore the bin however they please, they will take charge of their own learning and meet their own sensory and texture needs.
When I first brought out the bin, the first few minutes were spent by my daughter just rubbing her hands through the bin. She buried her own hand, picked up handfuls and poured them out, and really just had fun with the tactile stimulation it provided.
Once she was finished with that, she began sorting the dinosaurs, counting them, and using the tools to bury and discover them.
Mom hack: how to make sensory bin cleanup easier
It’s no secret that sensory bins tend to get a little…messy. Here are a few tips to make cleanup easier:
- Place the sensory bin on a plastic tablecloth. When you’re done, you can empty it into the garbage or back into the sensory bin.
- Do it outside. This is easier in the warmer months, but you can also do sensory bins in a garage or basement.
- Place the sensory bin in a plastic pool. This will contain the mess, and you can dump it when finished.
- Play on a clean, carpeted area. I find that the contents of the bin don’t spread as much on carpet. When they’re done, I just vacuum it all up quickly!
Do your kids love sensory bins and dinosaurs? I hope they love this dinosaur sensory bin! It’s been a highly requested one at our house.
For more fun ideas, follow me on Pinterest, Instagram and Facebook.

Im really excited I was able to find this article
I hope you enjoy!